
The New Speech Bubble Editor
The editor on every generator page has been rebuilt around one idea: the bubble should behave like an object you hold, not a form you fill in. Drag the tail to whoever is talking, type inside the bubble, resize and rotate it by its handles, undo anything, and come back to your work after a reload. Here is what changed and how to use it.
By Jam Hsiao ·
What changed, in one screen
Select a bubble and a small toolbar appears above it: Edit, Style, Colour, Font, then duplicate, bring forward, send backward, delete. Eight handles frame the bubble, a rotate handle hangs below it, and a red dot marks the tip of the tail. Everything you used to do from the side panel you can now do on the picture itself; the side panel is still there for people who prefer it, and it now fits on one screen without scrolling.
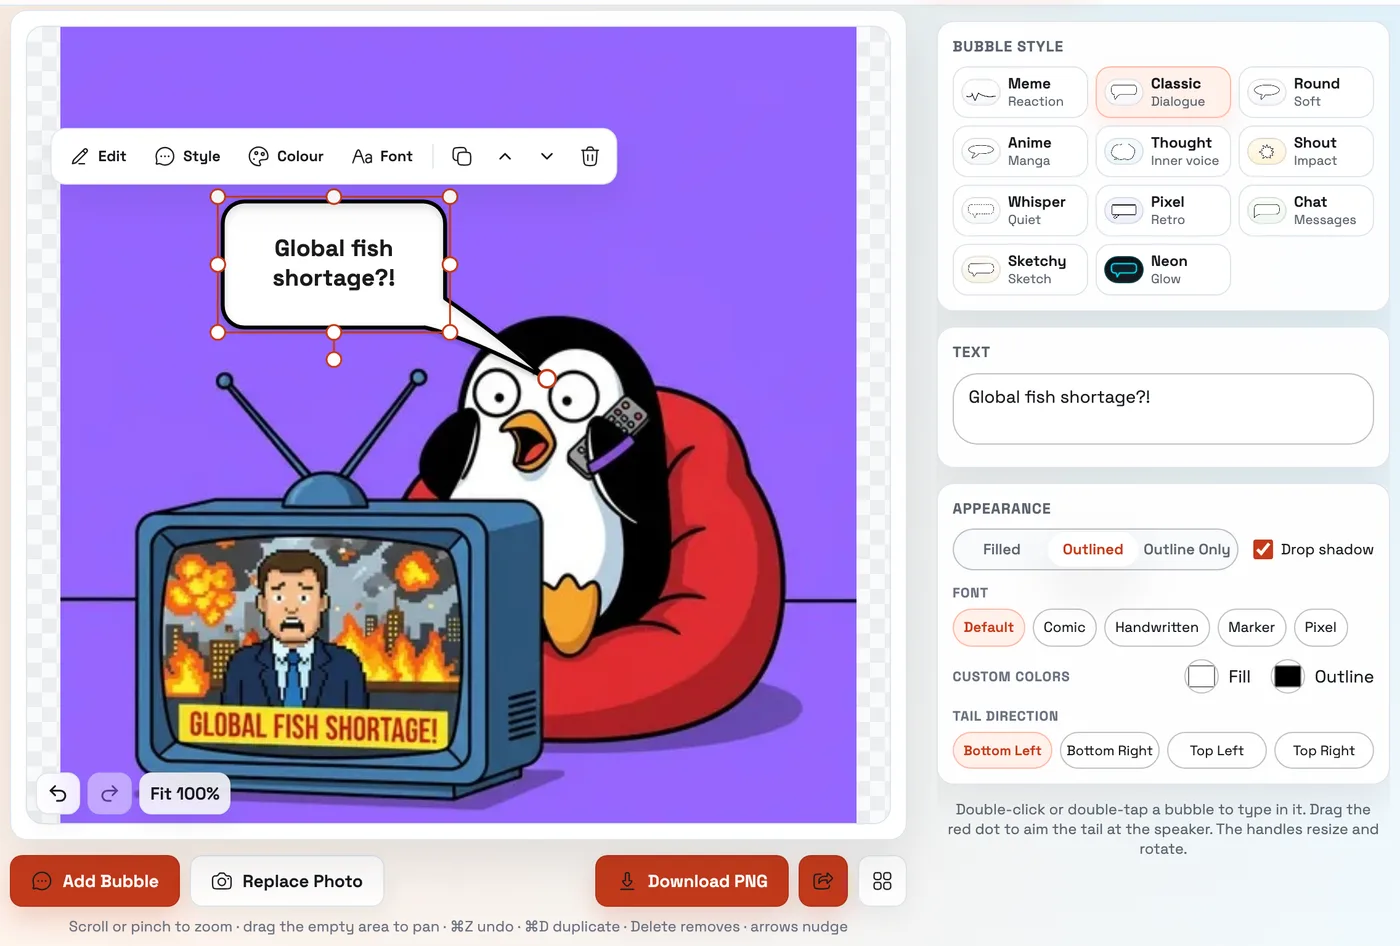
The change is live on the speech bubble maker and on every generator page, from the meme generator to the anime, pixel and Discord makers, in all eight languages.
Point the tail at whoever is talking
The old editor gave the tail four positions: bottom left, bottom right, top left, top right. If the person speaking was in the middle of the photo, you moved the whole bubble until one of the four corners lined up, then usually gave up and let the tail point at nothing.
Now the tail has a tip you drag. Pull the red dot to the mouth of whoever is speaking and the tail redraws from the nearest edge of the bubble to that point, at any angle, for all eleven styles. The classic and round bubbles grow a clean horn; the thought cloud strings its little circles toward the tip; the sketchy, whisper and neon styles keep their own line work; the pixel bubble keeps real pixel steps in every direction. The four corner presets are still in the panel for a quick default.
This is the single change we expect most people to feel. A bubble whose tail lands on the speaker reads as dialogue; one that points into empty space reads as a caption. If you are working with more than one character, see how to turn photos into a comic strip.
Type inside the bubble
Double-click a bubble on desktop, or double-tap it on a phone, and you type straight into it. The text wraps and shrinks to fit as you go, exactly as it will in the download. Press Esc or click outside to finish. The Text box in the side panel still works and stays in sync, so a long caption can be pasted there if you prefer.
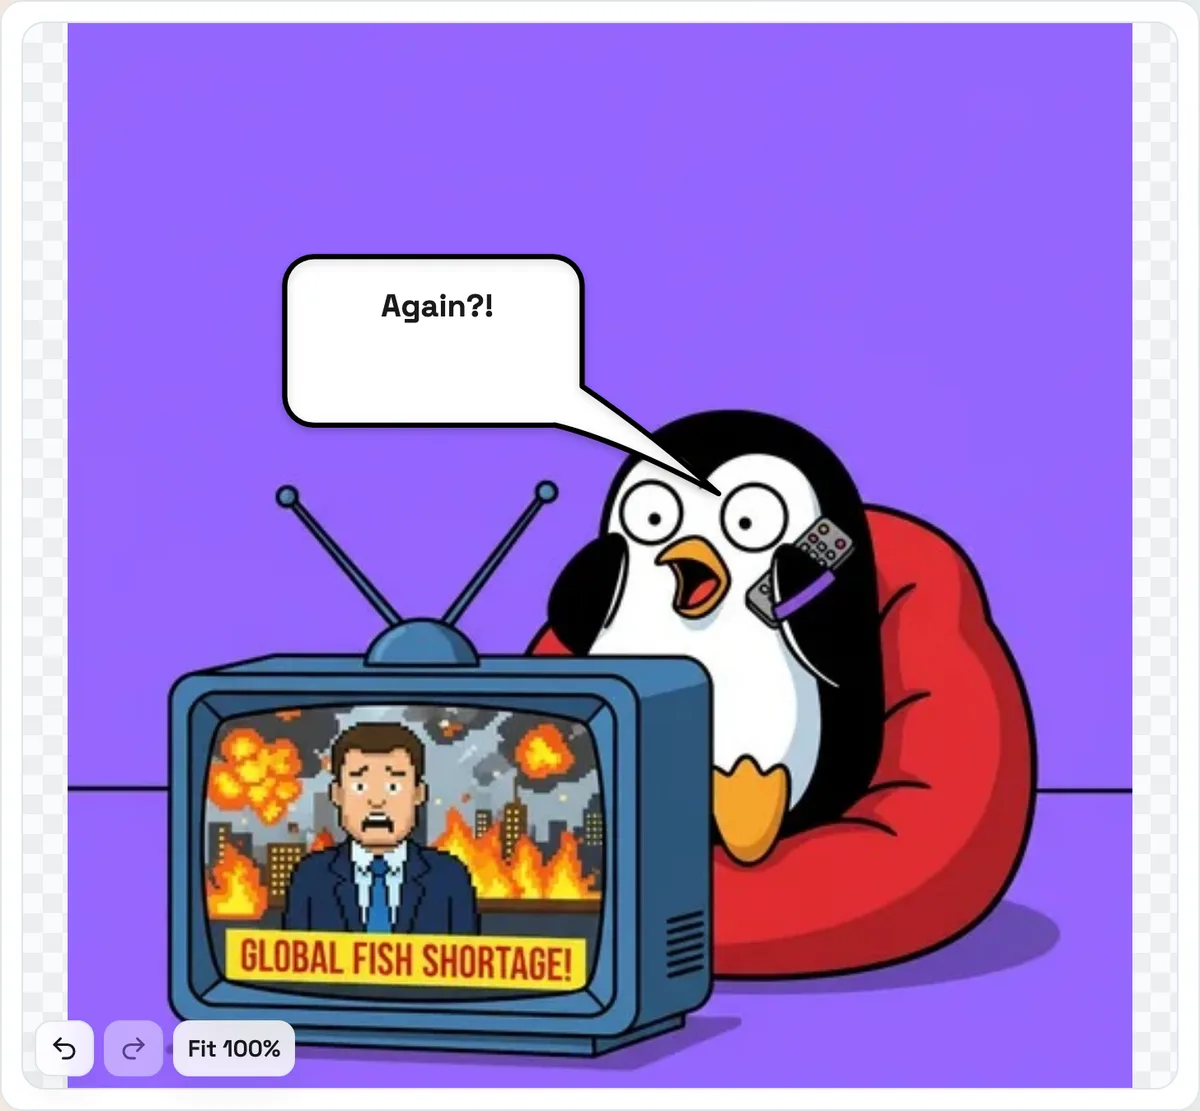
Fonts are unchanged: Default, Comic, Handwritten, Marker and Pixel, chosen from the toolbar or the panel. If you are deciding between them, our notes on speech bubble fonts cover which one suits which kind of image.
Resize, rotate, and stack bubbles
- Corner handles scale the bubble and keep its proportions.
- Side handles stretch it wider or taller on their own, for a long line or a tall shout.
- The rotate handle below the bubble turns it around its centre. A slight tilt is often all a reaction bubble needs to look placed rather than pasted.
- Duplicate makes a copy with the same style, text and tail, offset a little so you can see both.
- Bring forward / send backward control which bubble sits on top when they overlap.
- Delete removes the selected bubble; so does the Delete key.
You can put as many bubbles on one picture as you like. Each keeps its own style, so a classic bubble and a thought cloud can share a photo, which is the usual setup for the two pets talking format.
Undo, redo, and zoom
Every move, resize, rotation, text change and style change is one step in the history. ⌘Z (or Ctrl+Z) undoes it; ⇧⌘Z (or Ctrl+Y) redoes it. The undo and redo buttons sit in the bottom-left corner of the canvas, next to the zoom.
Scroll to zoom on desktop, pinch on a phone; drag the empty area to pan; the Fit button snaps the whole picture back into view. Zooming is only for you: the download is always the full picture at the original size, and the bubble is drawn at that size, not scaled up from the screen.
Your work survives a reload
The editor keeps a copy of your bubbles in your browser as you work. Close the tab by accident, come back, and a bar offers to continue where you left off or start fresh. Nothing is uploaded: the copy lives in your browser's storage, on your device, and the photo itself is never sent anywhere. Clear it with Start fresh whenever you like.
On a phone
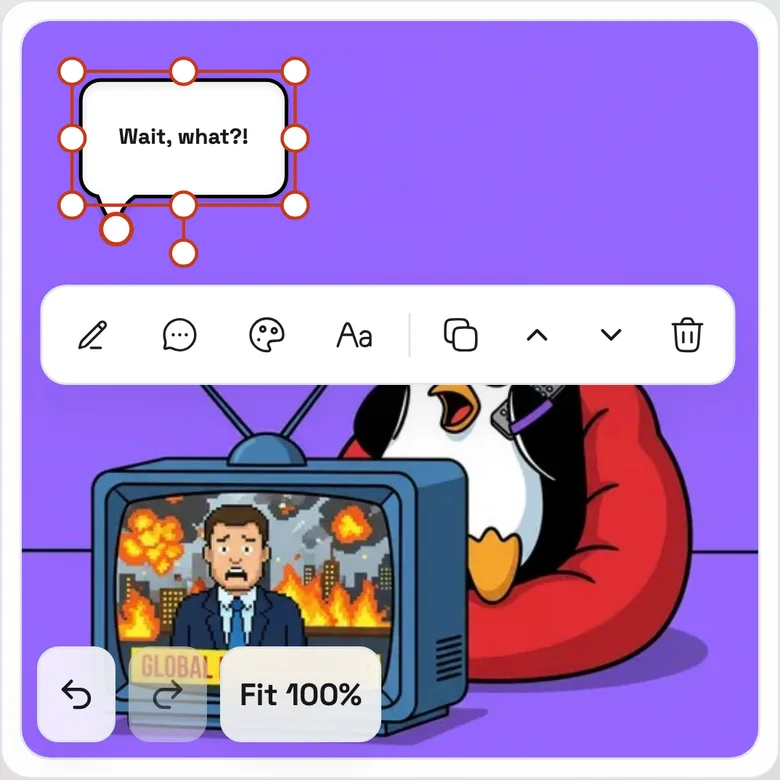
The same toolbar appears above the selected bubble, or below it when the bubble sits at the top of the picture. Handles are sized for a thumb, the tail's red dot can be dragged with a finger, and a two-finger pinch zooms without losing the selection. Add, download, share and delete stay in the bar at the bottom of the screen.
What did not change
- It is still free, still works without an account, and still exports a PNG with no watermark, transparent if you skip the photo.
- All eleven bubble styles are the same shapes as before, drawn by the same code, so bubbles you made last month look identical today.
- Templates and gallery designs still open in one tap, and templates you saved earlier still load. New saves also remember the tail position and rotation.
- Share links you sent before still open. New share links carry the new fields.
- Your photo never leaves your device. Rendering happens in the browser.
Keyboard shortcuts
| Action | Mac | Windows |
|---|---|---|
| Undo | ⌘Z | Ctrl+Z |
| Redo | ⇧⌘Z | Ctrl+Y |
| Duplicate the selected bubble | ⌘D | Ctrl+D |
| Delete the selected bubble | Delete | Delete |
| Nudge one pixel (ten with Shift) | Arrow keys | Arrow keys |
| Edit the text | Double-click | Double-click |
| Finish editing / deselect | Esc | Esc |
| Zoom | Scroll | Scroll |